Foreword
This guide is specifically written with the Nintendo Switch version of Bedrock in mind. However, similar concepts may translate just fine to other versions.This is madness, madness I say!
Now, after reading the title of this thread you may be thinking:Well I'm here to tell you that it can be done, albeit with some prerequisites and limitations.Bedrock and Java together, that's like cats and dogs singing Kumbaya, blasphemy!
Prerequisites
To make this work, you will need at minimum:- A Nintendo Switch console with internet access
- A Java Edition account
- An active subscription to Nintendo Switch Online*
Limitations
There are several issues you may encounter while playing via Bedrock:- You have to login to your Microsoft/Mojang account every time you wish to connect
- Some server commands and user interfaces may not work
- Custom heads will not display in inventories
- You cannot enter the Nether roof (it doesn't exist in bedrock)
- Climbing up enclosed ladders may trigger AntiCheat
- You cannot see more than 6 banner layers
- Boats may not work correctly, and often disappear when exiting
- Best workaround is to have a friend on Java Edition drive the boat
- Navigating near bamboo can be difficult
- Dolphins Grace may not work correctly
- Spectral Arrows show as regular arrows
- You can become partially stuck if caught in a bubble column underneath a closed trapdoor
- AntiCheat plugins may react adversely in some scenarios
Therefore, by doing this, you acknowledge that stuff may not work as well as it would on Java Edition.
Well, that's okay... Let's do this!
I like your enthusiasm!Testing spoiler for sneaky rewrite of tutorial...
Step 1
Turn on your Switch and go to the settings menu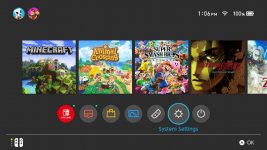
Step 2
In the settings menu, scroll down to "Internet" and then select "Internet Settings"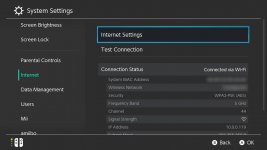
Step 3
Next, find your WiFi network from the list, select it, and then press "Change Settings"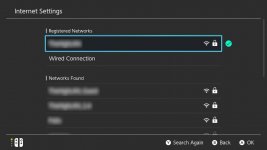
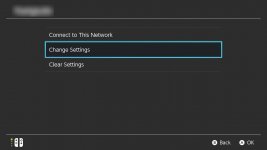
Step 4
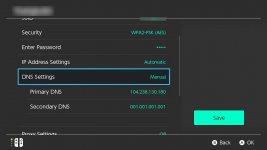
Now, scroll down to "DNS Settings" and change the mode from "Automatic" to "Manual"Following this, set the "Primary DNS" address to
104.238.130.180 and the "Secondary DNS" address to 1.1.1.1The first address is that of a public BedrockConnect server, which basically gives you the ability to enter custom server details on the more limited console versions.
The second address is Cloudflare's public DNS server, you could use Google's or any other if you wish.
If you are using a PS4, you will have to use
173.82.100.84 instead for the primary DNS.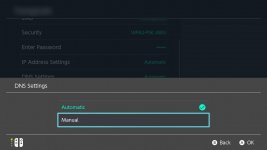
Step 5
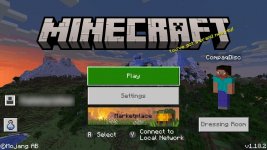
Go ahead and save the new settings, then return to the home screen and start MinecraftIt may be a good idea to first restart the console, although that didn't seem to be necessary for me.
Step 6
Select "Play" and navigate to the "Servers" tab. After that go ahead and select "Join Server" on any of them.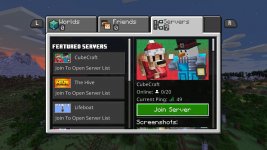
Step 7
After a while you should load into a screen with the title "Server List"Select "Connect to a Server", and fill in the following information:
Server Address:
relay.compaqdisc.comServer Port:
4142Display Name: Eternal Realms
Add to server list: Yes
When complete, select "Submit"
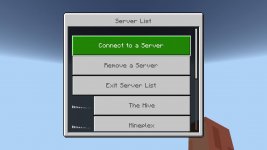
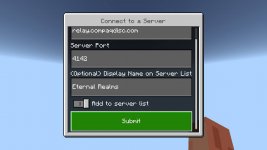
Step 8
After waiting a while longer you will be presented with a Login page.Please select the type of login you use for your account.
(Migrated accounts or accounts created on or after December 1st, 2020 will be Microsoft accounts, all others will be Mojang accounts)
If you use a Microsoft account, I recommend selecting "Log in with a web browser" on the next screen, as it will be compatible with 2FA and is generally a better experience.
If logging in with a web browser, you will be prompted to enter a code on Microsoft's website, and then asked to authorize the Geyser application.


Step 9
Tada! You are now logged in to Eternal Realms, enjoy!
Last edited:

